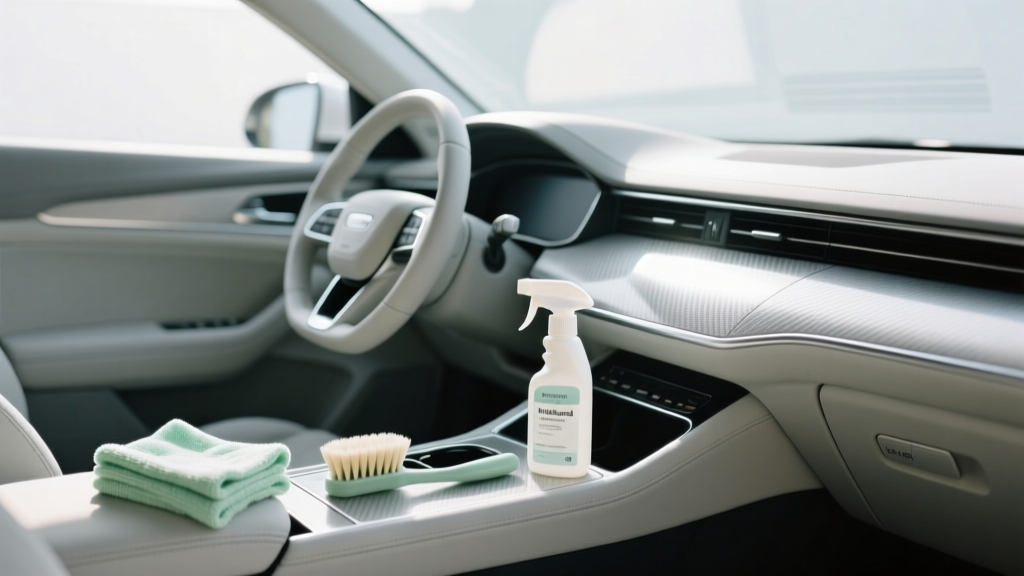
Dashboard Cleaning Handbook for Beginners (2026)
Your car?s dashboard is the interior?s front stage. It?s where sunlight hits hardest, dust settles fastest, and fingerprints somehow appear even when you swear no one touched it. A clean dashboard doesn?t just look good?it improves visibility by reducing glare, helps your materials last longer, and makes the whole cabin feel fresher and more cared-for.
If you?re new to interior detailing, the dashboard can also be one of the easiest places to accidentally mess up. The wrong cleaner can leave a shiny, greasy finish that reflects into your windshield. Too much moisture can seep into seams, switches, and vents. And some products can discolor soft-touch plastics or dry out leather and vinyl. This handbook walks you through a simple, beginner-friendly process that works for most vehicles?plus the variations you?ll need depending on your dashboard material.
Whether you drive a daily commuter, a weekend fun car, or a family SUV, these techniques will help you build a repeatable routine. You don?t need a garage full of products?just a few smart tools, the right cleaners, and a method that prioritizes safety and a factory-fresh look.
Know Your Dashboard Materials (So You Don?t Damage Them)
Before you spray anything, take a minute to identify what you?re cleaning. Most modern dashboards are a mix of materials, and each one reacts differently to chemicals and scrubbing.
Common dashboard surfaces
- Textured plastic / hard plastic: Most common; durable but can trap dust in texture.
- Soft-touch plastic: Feels rubbery; can stain or get ?shiny spots? if scrubbed aggressively.
- Vinyl: Often on upper dash pads; can dry out or haze with harsh cleaners.
- Leather-wrapped dashboards: Found in luxury cars; needs gentle leather-safe products.
- Piano black trim: Scratches easily; requires ultra-soft microfiber and careful technique.
- Touchscreens / gauge clusters: Sensitive coatings; needs screen-safe cleaner and minimal pressure.
Quick test: If you?re unsure, start with the mildest option (a damp microfiber with distilled water) on an inconspicuous spot. If it leaves streaks, tackiness, or discoloration, stop and adjust your product choice.
Tools and Supplies: A Beginner Kit That Actually Works
You can clean a dashboard with just a towel, but having the right tools makes results cleaner and prevents scratches. Here?s a practical kit most car owners can build without overspending.
Must-have tools
- Microfiber towels (at least 4?6): Use separate towels for cleaning, drying, and buffing.
- Soft detailing brushes: One small brush for vents/buttons, one medium for seams and textures.
- Vacuum with soft brush attachment: Helps remove gritty dust before wiping (key for scratch prevention).
- Interior cleaner (plastic-safe): A dedicated interior cleaner is more predictable than household products.
- Protectant with UV protection (matte/satin): Helps reduce fading and keeps a factory look.
Nice-to-have add-ons
- Compressed air or an electric air duster: Blows dust from vents and tight seams.
- Cotton swabs or foam swabs: Useful around badges, stalks, and tiny crevices.
- Distilled water: Reduces mineral spotting compared to tap water.
Product Recommendations (Beginner-Friendly Picks)
There are countless dashboard cleaners and protectants. For beginners, the goal is predictable results: no greasy shine, no strong residue, and safe on mixed surfaces.
Interior cleaners (for routine cleaning)
- Meguiar?s Quik Interior Detailer: Easy wipe-on/wipe-off, good for light dust and fingerprints.
- Chemical Guys Total Interior Cleaner & Protectant: Convenient all-in-one approach; works well for quick maintenance.
- 303 Multi-Surface Cleaner: Stronger cleaning without feeling harsh; great when dashboards look ?grimy.?
Protectants (for UV protection and a non-greasy finish)
- 303 Aerospace Protectant: Popular for a natural satin finish and UV resistance; excellent for vinyl and plastic.
- Meguiar?s Natural Shine Protectant: Leaves a subtle finish (avoid ?high gloss? variants if glare bothers you).
Screen-safe options
- Screen cleaner designed for electronics: Use sparingly and always spray onto the towel, not the screen.
- Distilled water + clean microfiber: Often enough for light smudges on infotainment screens.
What to skip: household glass cleaners with ammonia, harsh degreasers, and silicone-heavy ?super shiny? dressings. They can haze plastics, cause glare, and attract dust.
Step-by-Step Dashboard Cleaning (Beginner Method)
This process is designed to be safe for most dashboards and easy to repeat. Plan for 20?40 minutes depending on how detailed you get.
Step 1: Park smart and let the cabin cool
- Park in shade if possible, or wait until the dashboard is cool to the touch.
- Open doors for a minute to vent hot air.
Why this matters: Products can streak or flash-dry on hot surfaces, and cleaning becomes harder when plastics are warm.
Step 2: Remove loose items and dry-debris first
- Clear the top of the dash, cupholders, and any dash mats.
- Use a vacuum with a soft brush attachment to remove dust and grit along seams and at the windshield base.
Real-world example: If you wipe a dusty dashboard without vacuuming, the dust can act like sandpaper?especially on piano black trim and gauge cluster plastic.
Step 3: Dust the cracks and vents before wiping
- Use a soft detailing brush to agitate dust in vents, around buttons, and along stitched seams.
- Vacuum as you brush or use a quick burst of air to push dust out, then vacuum.
- Tip: Hold the vacuum nozzle nearby while brushing vents to catch dust before it falls onto clean surfaces.
Step 4: Clean with the ?spray the towel? rule
- Lightly mist your interior cleaner onto a microfiber towel (not directly onto the dash).
- Wipe the dashboard in straight lines, working from the top down.
- For textured plastic, use gentle pressure and let the towel?s nap pull dirt out of the texture.
Why spray the towel: It prevents cleaner from seeping into electronics, speaker grilles, seams, and vent mechanisms.
Step 5: Detail tight areas with a brush (lightly)
- For grime around buttons or textured areas, spray cleaner onto the brush (one spritz).
- Agitate gently, then immediately wipe with a clean microfiber.
- Tip: Use a smaller brush around steering column stalks, ignition areas, and touch-sensitive controls.
Step 6: Dry and level the finish
- Use a separate dry microfiber towel to buff the surface and remove any remaining residue.
- Check for streaks by viewing from different angles.
Step 7: Apply protectant (optional, but recommended)
- Apply a small amount of protectant to a clean applicator pad or microfiber towel.
- Spread thinly and evenly?less product looks better and attracts less dust.
- Buff with a fresh microfiber to achieve a natural matte or satin finish.
Glare check: Sit in the driver?s seat and look at the windshield. If you see heavy reflections, you used too much product or chose a high-gloss dressing.
Special Surfaces: Touchscreens, Gauge Clusters, and Piano Black
Touchscreens and gauge cluster lenses
- Use a dedicated screen microfiber (clean and dry).
- For smudges, use distilled water or a screen-safe cleaner sprayed onto the towel.
- Wipe gently with minimal pressure to avoid micro-scratches.
Practical tip: If your cluster lens already has light swirls, stop chasing perfection with aggressive wiping. Focus on gentle cleaning to prevent it from getting worse.
Piano black trim
- Never dry-wipe dusty piano black.
- Use a damp microfiber first (distilled water works well), then a dry microfiber to buff.
- Use ultra-soft towels reserved only for glossy trim.
How Often Should You Clean Your Dashboard?
Your routine depends on climate, where you park, and whether you drive with windows down. Here?s a simple schedule that works for most drivers:
- Weekly: Quick dusting/wipe-down with a dry microfiber or interior detailer.
- Monthly: Full clean (vacuum + cleaner + dry buff).
- Every 2?3 months: Apply UV protectant (more often in hot, sunny climates).
Example: If you park outside in Arizona or Florida, UV protection every 4?6 weeks can make a noticeable difference in preventing fading and drying.
Common Dashboard Cleaning Mistakes to Avoid
- Using glass cleaner with ammonia: Can haze plastics and damage tinted/clear plastics over time.
- Spraying product directly into vents or onto the dash: Risks residue buildup, dripping, and electrical issues.
- Over-applying shiny dressings: Creates glare on the windshield and attracts dust like a magnet.
- Scrubbing soft-touch materials hard: Can create permanent shiny patches or discoloration.
- Cleaning in direct sun on a hot dash: Causes streaks and makes residue harder to remove.
- Using one towel for everything: Dirt-loaded towels scratch glossy trim and smear oils around.
Pro-Level Practical Tips (That Beginners Can Use Immediately)
- Color-code your towels: One color for screens/gloss, one for general plastics, one for dirty jobs.
- Work top to bottom: Dust falls. Clean the dash before the center console and lower panels.
- Keep product use minimal: If the surface feels oily after cleaning, you used too much.
- Use a soft brush at the windshield base: That area collects dust and pollen and is easy to miss.
- For lingering odor sources: Dust and grime around vents can hold smells?cleaning vents plus replacing the cabin air filter can help.
FAQ: Dashboard Cleaning for Beginners
What?s the safest DIY cleaner for a dashboard if I don?t have detailing products?
A clean microfiber towel lightly dampened with distilled water is the safest starting point. For slightly oily grime, a mild interior cleaner is better than using dish soap or household cleaners that may leave residue.
Should my dashboard look shiny after cleaning?
Not necessarily. Most factory dashboards have a matte or satin finish. A natural, low-sheen look usually means you cleaned and protected it correctly?and it reduces windshield glare.
How do I remove sticky residue (like old protectant or spilled drinks)?
Use a dedicated interior cleaner and work in small sections. Spray onto a towel, hold it against the spot briefly to soften residue, then wipe. For stubborn buildup in texture, use a soft brush with light agitation and wipe immediately.
Can I use disinfecting wipes on my dashboard?
Occasionally, but be cautious. Some disinfecting wipes contain stronger chemicals that can dull finishes or leave streaks. If you use them, follow with a damp microfiber (distilled water) and dry buff to remove residue?avoid screens and clear plastics.
What?s the best way to clean dashboard vents?
Brush first, vacuum while brushing, and avoid soaking the area. A soft detailing brush plus a vacuum brush attachment is the simplest combo. Compressed air can help, but it can also blow dust deeper if you don?t vacuum at the same time.
How do I prevent dust from coming back so fast?
Use a protectant that dries to a non-greasy finish and buff it well. Greasy dressings attract dust. Also, keep windows closed on dusty roads and replace your cabin air filter on schedule.
Your Next Steps: A Simple Routine You Can Repeat
If you want the biggest improvement with the least effort, follow this repeatable routine:
- Weekly: Quick wipe with a clean microfiber (or a light interior detailer).
- Monthly: Vacuum seams + clean with interior cleaner using the spray-the-towel method.
- Every 2?3 months: Apply a UV protectant and buff to a natural finish.
Once you?ve done it a couple times, dashboard cleaning stops feeling like a chore and starts feeling like maintenance?like changing oil, but for the cabin you sit in every day.
Want more interior care walkthroughs? Browse the latest guides and product tips on carinteriormix.com.